See the workouts:
One of the best-kept fitness secrets is that you don’t have to spend hours a day, every day, in the gym to see results. To make the most of the time you have, many experts recommend metabolic conditioning — a workout protocol designed to maximize the potential of your body’s energy systems, resulting in a stronger, fitter, and faster you. And the workouts last no more than 30 minutes, tip to tail.
Metabolic conditioning, or metcon, aims to increase the efficiency of your three energy systems: adenosine triphosphate–creatine phosphate (ATP-CP), glycolytic, and oxidative. These systems work together to fuel activities of varied intensities or effort. (For more on these systems, see “All About Your Metabolic Energy Systems.”)
The magic of metcon lies in the timing of interval workouts that stimulate one energy system to work harder than the other two. The goal is to balance adequate rest periods with movements of varying intensities, so you’re ready to get moving again once the timer beeps. This work–rest structure requires a lot of effort in a short period of time.
Targeting each energy system in two or three discrete sessions spread throughout the week makes metabolic-conditioning workouts “physiologically smart,” explains Tineile Heiler, creator of Life Time’s Alpha Metcon program. This avoids the pitfall of workouts designed to make you feel like you’ve been run over by a steamroller — and potentially so exhausted or discouraged that you quit.
Perhaps the most attractive aspect of metabolic conditioning is approachability: Timed intervals allow you to move at your own speed. Whether you’re an exercise newbie or a seasoned athlete, you can go at a pace that feels challenging for you.
The Metcon Program
This Alpha Metcon workout consists of two or three timed-interval workouts per week, repeated over a period of eight weeks. Day 1 targets strength; day 2, endurance. Day 3, intended for more advanced exercisers, builds power.
Spread the workouts throughout the week, and plan for each workout to last no more than 30 minutes from start to finish.
If you’re uncertain about what weights to choose, follow workout designer Tineile Heiler’s advice to keep them challenging but not so heavy that they compromise form. “On the strength and power days, the time intervals are shorter, so your weights can be a bit heavier than on the endurance day, when the time interval is longer and you’ll need to pace yourself,” she says.
And don’t let your workouts go unchecked: Track your weights, reps, and rounds in a workout journal.
Begin with day 1 and day 2; as your fitness improves, add day 3 to the mix, attempt to lift heavier weights, or complete more reps and rounds.
Day 1: Strength
Workout Guidelines
Work-to-Rest Ratio: Set your workout timer for 45 seconds of work, 45 seconds of rest.
Rounds: Complete as many good-form reps of the first exercise as possible within 45 seconds. Rest for 45 seconds before moving on to the next exercise (take extra rest time as needed). Perform three to five rounds of this strength routine.
Dumbbell Bench Press
Full Instructions
- Sitting on the end of a bench, hold two dumbbells in front of you, resting them against your thighs.
- Lie back, bringing the dumbbells to the bottom position of the bench press at the sides of your chest. Press your feet into the floor and arrange your hands in the most comfortable position for you, palms facing either in or down toward your feet.
- Press the weights straight up until your arms are fully extended above your sternum.
- Lower the bells completely and with control, and immediately press them back up.
Make It Easier: Use lighter weights or, instead of pressing from a bench, position yourself on the floor.
⊕ Complete as many good-form reps of the first exercise as possible within 45 seconds.
⊕ Rest for 45 seconds before moving on to the next exercise (take extra rest time as needed).
Dumbbell Walking Lunge
Full Instructions
- Stand tall while holding two dumbbells at your sides and take a large step forward with one leg. Lower your hips as far as you can while maintaining control.
- Return to standing by pulling your body up with your lead leg, driving through your heel and bringing the back foot forward.
- Alternate repetitions on both sides for desired reps.
Make It Easier: Ditch the dumbbells and perform body-weight lunges.
⊕ Complete as many good-form reps of the first exercise as possible within 45 seconds.
⊕ Rest for 45 seconds before moving on to the next exercise (take extra rest time as needed).
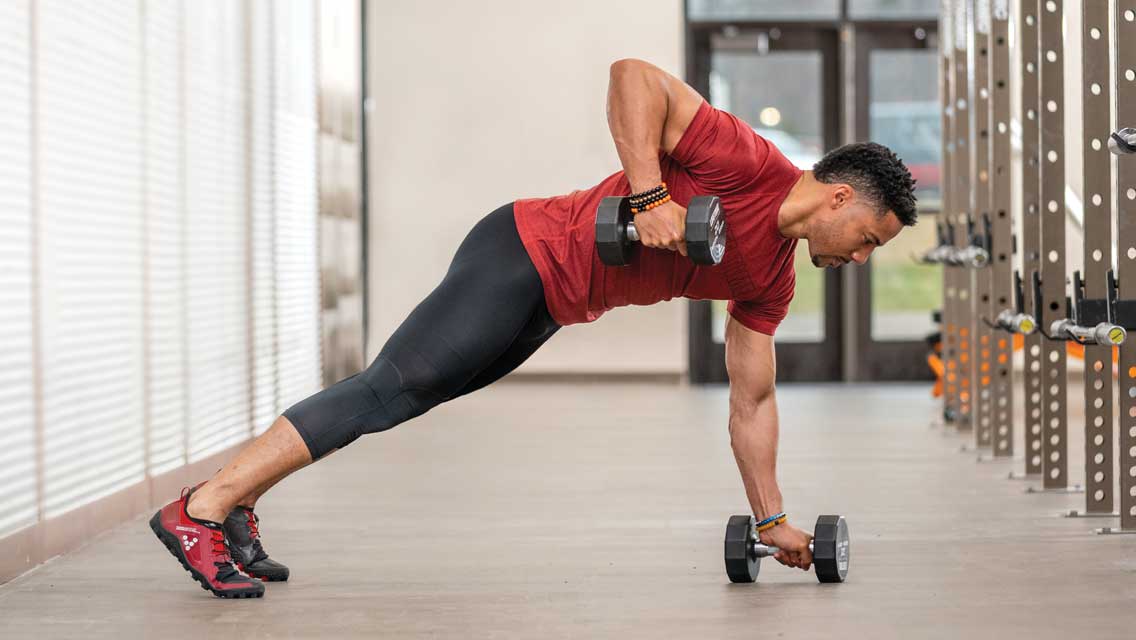
Dumbbell Renegade Row
Full Instructions
- Assume a straight-armed plank position with your body elevated between your hands and toes, your hands grasping the handles of a pair of dumbbells. Make sure to line up your hands directly under your shoulders, just wider than your rib cage.
- Without shifting your hips or body position, row one of the dumbbells up toward your rib cage, keeping your elbow no more than 30 degrees away from your body. Your weight will balance on the opposite dumbbell on the floor.
- Lower the weight back to the ground, then repeat with the opposite arm.
- Alternate back and forth between sides, keeping your midsection braced and glutes squeezed so your body position changes minimally, if at all. Do not rock back and forth. If you need more stability, widen the distance between your feet.
Make It Easier: Hold a body-weight plank instead.
⊕ Complete as many good-form reps of the first exercise as possible within 45 seconds.
⊕ Rest for 45 seconds before moving on to the next exercise (take extra rest time as needed).
Body-Weight Squat With Pulse
Full Instructions
- From a standing position, initiate the squat by pushing your butt backward and bending your knees.
- From the bottom position, rise one-third to halfway up.
- Lower back down to your bottom position.
- From the bottom position, rise back to the starting position. Repeat.
Make It Easier: Take out the pulse to perform a body-weight squat.
⊕ Complete as many good-form reps of the first exercise as possible within 45 seconds.
⊕ Rest for 45 seconds before moving on to the next exercise (take extra rest time as needed).
⊗ Perform three to five rounds of this strength routine.
Day 2: Endurance
Workout Guidelines
Work-to-Rest Ratio: Set your workout timer for two minutes of work, one minute of rest.
Rounds: Complete as many reps of each exercise with good form within two minutes for five to eight rounds of this endurance circuit. Rest for one minute between each work interval, taking extra rest as needed.
Endurance Circuit
Medicine-Ball Overhead Slam
Full Instructions
- Start with the med ball on the floor in front of you, and grasp it with both hands with your knees bent.
- Quickly stand up, using the power of your hips, core, and arms to bring the med ball directly overhead.
- Vigorously slam the ball into the ground in front of you as hard as possible.
- Repeat, raising the med ball overhead as high as possible.
Make It Easier: Use a lighter med ball.
⊕ Complete as many reps with good form within two minutes.
⊕ Rest for one minute, taking extra rest as needed.
Body-Weight Squat
Full Instructions
- From a standing position, initiate the squat by pushing your butt backward and bending your knees.
- Lower your hips to parallel or as far as you can with full control.
- Squeeze your glutes to rise back to the starting position. Repeat.
Make It Harder: Perform jump squats.
⊕ Complete as many reps with good form within two minutes.
⊕ Rest for one minute, taking extra rest as needed.
Medicine-Ball Russian Twist
Full Instructions
- Start in a seated position on the floor with your legs bent and your spine tall.
- Holding a medicine ball to your sternum, lean back.
- Rotating through your rib cage, move the weight from hip to hip.
- Challenge the core more by leaning back farther (while still maintaining a tall chest) or elevating your feet to balance on your butt.
Make It Easier: Perform body-weight-only twists, focusing on a full rotation.
⊕ Complete as many reps with good form within two minutes.
⊕ Rest for one minute, taking extra rest as needed.
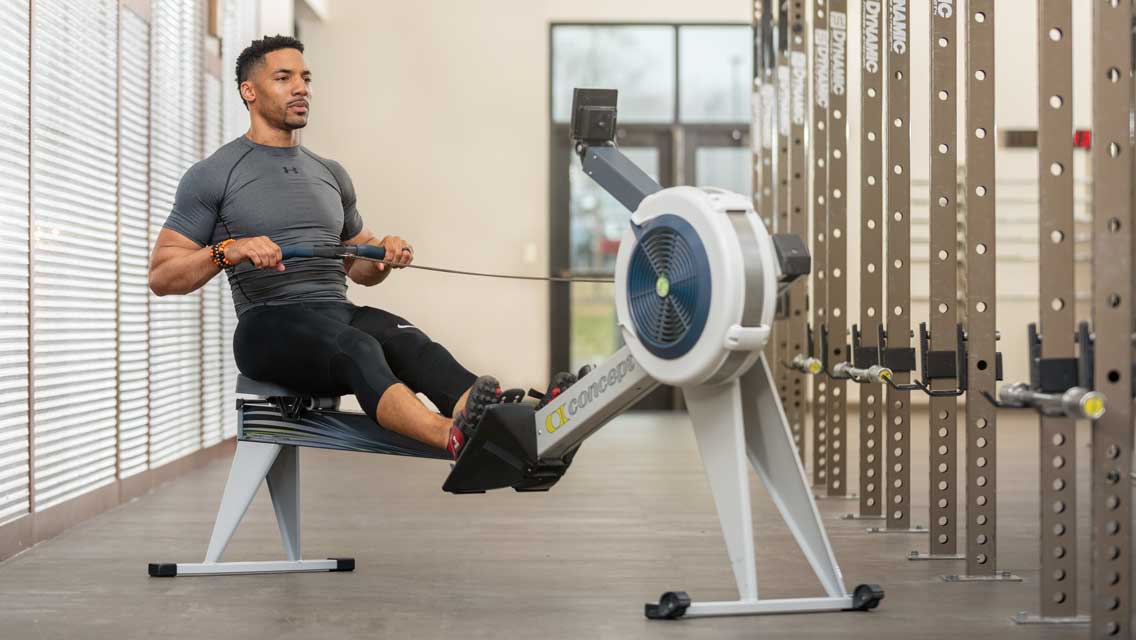
Rowing Machine
Full Instructions
- Start seated in the rower with hands grasping the handles, and with hips and knees bent, arms straight, head neutral, back straight, and shoulders level.
- Initiate the drive with your feet, pressing through your heels and using the strength of your legs to propel yourself backward.
- Lean back slightly, and as your legs straighten, pull the handle toward your body. Keep your shoulders relaxed and squeeze your shoulder blades together as you row.
- Finish the pull with legs straight and the handle below your ribs. Your shoulders should still be relaxed and your wrists should be straight.
- Extend your arms until they are straight, then lean forward at the hips.
- Once your hands have cleared your knees, allow your knees to bend and gradually slide your seat forward.
- Repeat.
⊕ Rest for one minute, taking extra rest as needed.
Day 3: Power
Optional; for advanced exercisers only.
Workout Guidelines:
Work-to-Rest Ratio: Set your workout timer for 20 seconds of work, 40 seconds of rest.
Rounds: In circuits A and B, complete as many explosive good-form reps as possible within 20 seconds for three to six rounds, for each of these power circuits. Rest for 40 seconds between each work interval, taking extra rest as needed.
Wait until you’re completely recovered from circuit A before moving on to circuit B.
Circuit A Exercises
A1. Body-Weight Explosive Pushup
Full Instructions
- Start facing the floor in a straight-arm plank position, with your body elevated between your hands and toes.
- Line up your hands directly under your shoulders, just wider than your rib cage.
- With a stiff core and squeezed-together glutes, lower your body down as far as you can while maintaining control, angling your elbows out to no more than 45 degrees. Don’t let your lower back sag.
- From the bottom position, explode away from the floor using your arms while keeping your midsection stiff. Your palms or entire hand may leave the floor, but keep your hands out and at the ready for the catch.
- Catch yourself by lowering into the next pushup as your hands touch the floor. Quickly perform the desired number of repetitions.
Make It Easier: Elevate your hands on a box, bench, or other sturdy surface and perform pushups without the explosive element.
⊕ Complete as many explosive good-form reps as possible within 20 seconds.
⊕ Rest for 40 seconds between each work interval, taking extra rest as needed.
A2. Body-Weight Two-Legged Lateral Hop
Full Instructions
- Place a low hurdle or a line (a jump rope or towel will do) on the ground and stand beside it.
- Jump back and forth over the hurdle or line while staying on the balls of your feet.
- Move quickly and explosively throughout the set, and be sure to land with a slight knee bend each time you jump
Make It Harder: Jump as high as you can while still maintaining a controlled landing.
⊕ Complete as many explosive good-form reps as possible within 20 seconds.
⊕ Rest for 40 seconds between each work interval, taking extra rest as needed.
A3. Body-Weight Seated Jump Squat
Full Instructions
- Find a box or bench that is high enough so that when you sit down, your hips are higher than your knees.
- Sit with your torso leaning slightly forward and your feet spaced in an athletic squat stance.
- From this seated position and a dead stop, jump upward as high as possible and slightly forward (so you don’t land on your bench). Do not rock into the jump.
- Land as quietly as possible and lower into a full squat as soon as the balls of your feet hit the ground, making sure knees track in line with your feet.
- Reset, taking a seat on the bench. Repeat the jumps for the desired reps, always taking a full seat and jumping from a dead stop.
⊕ Complete as many explosive good-form reps as possible within 20 seconds.
⊕ Rest for 40 seconds between each work interval, taking extra rest as needed.
⊗ Perform three to six rounds of power circuit A.
⊗ Wait until you’re completely recovered before moving on to circuit B.
Circuit B Exercises
B1. Kettlebell Two-Handed Swing
Full Instructions
- Place a kettlebell on the floor about a foot in front of you, with both hands gripping the handle, butt high in the air, and knees bent in an athletic stance.
- Hike the kettlebell back and up between your legs and push your butt back, slightly straightening your legs as you do this. Your forearms should make contact with your upper thighs.
- When the kettlebell reaches its farthest point back, quickly stand up, using the power of your hips, hamstrings, and glutes to “float” the kettlebell up to about shoulder height. Make sure to keep your shoulders pulled back and down, and don’t let the bell pull your chest forward.
- Reverse the movement by pulling the kettlebell down through the same arc, staying upright as long as possible before you push your hips backward and swing the kettlebell high between your legs. Keep your chest up the entire time; someone across the room should be able to read the writing on your shirt.
- Repeat for the desired number of repetitions, using a powerful hip extension to generate upward momentum in the bell.
- When you’re ready to stop, pause at the bottom of the swing portion, gently parking the kettlebell on the floor in front of you.
⊕ Complete as many explosive good-form reps as possible within 20 seconds.
⊕ Rest for 40 seconds between each work interval, taking extra rest as needed.
B2. Battle-Rope Slam
Full Instructions
- Hold the ends of the rope at arm’s length in front of your hips with your hands shoulder width apart.
- Brace your core and begin alternately raising and lowering each arm explosively.
⊕ Complete as many good-form reps as possible within 20 seconds.
⊕ Rest for 40 seconds between each work interval, taking extra rest as needed.
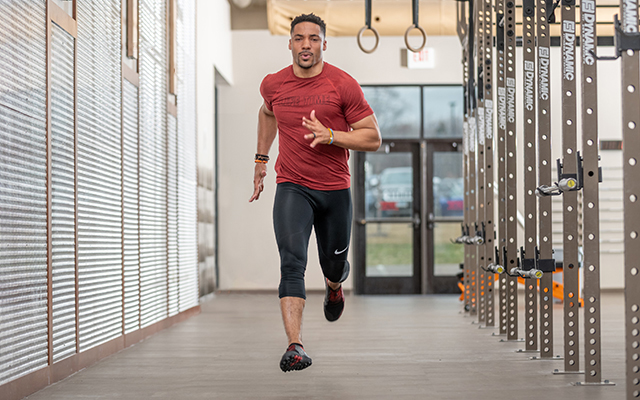
B3. Body-Weight Sprint
Full Instructions
- Be sure you have ample space for your sprints, as well as space to be able to brake under control. Use a treadmill if convenient.
- At the start, lean forward aggressively and push the ground down and behind you as hard as possible.
- Keep your elbows tucked close to your body. Think about moving your hands from chin to back pocket (but no higher or farther back than that, respectively).
Make It Easier: Jog on a track or treadmill.
⊕ Sprint for 20 seconds.
⊕ Rest for 40 seconds between each work interval, taking extra rest as needed.
⊗ Perform three to six rounds of power circuit B.

This Post Has One Comment
These are great but there is no mention of how to establish the weight to use or the number of reps. Essentially useless without that information.